With the caravan cocooned in its shelter, there were no more excuses to put off the inevitable; it was time to start the restoration in earnest. Lou bought a random orbital sander and got to work sanding the paint off. Make no mistake, this is a long, laborious, time-consuming job, made longer as we both work full time, so can only spend time on it at weekends. If any of you have ever asked a restoration business for a quote and have been shocked by how much they are charging, this is the reason. Anyone who quotes a few hundred quid for a respray is not spending the time in preparing the body thoroughly and this will show in their paint job. Lou got through hundreds of sanding discs and three sanding plates (the part of the sanding machine to which the discs are attached). Sanding the old paint off took in excess of nine months. I cannot stress enough how tedious this part of a restoration is, and Lou showed great determination to complete this job. Yes, we could have cut corners by not going back to the substrate, but we wanted to do the best job we could, and didn’t want to risk uneven paint, or a reaction between old and new paint. Also, there are easier ways to remove old paint. We could have bought a compressor and a dual action sander, but didn’t want that kind of expenditure. Alternatively, we could have had the caravan sand blasted, but again, cost was a factor, along with wanting to do it ourselves.
 |
| Don't let this fool you. The paint isn't that good! |
 |
| This is what it's really like. |
 |
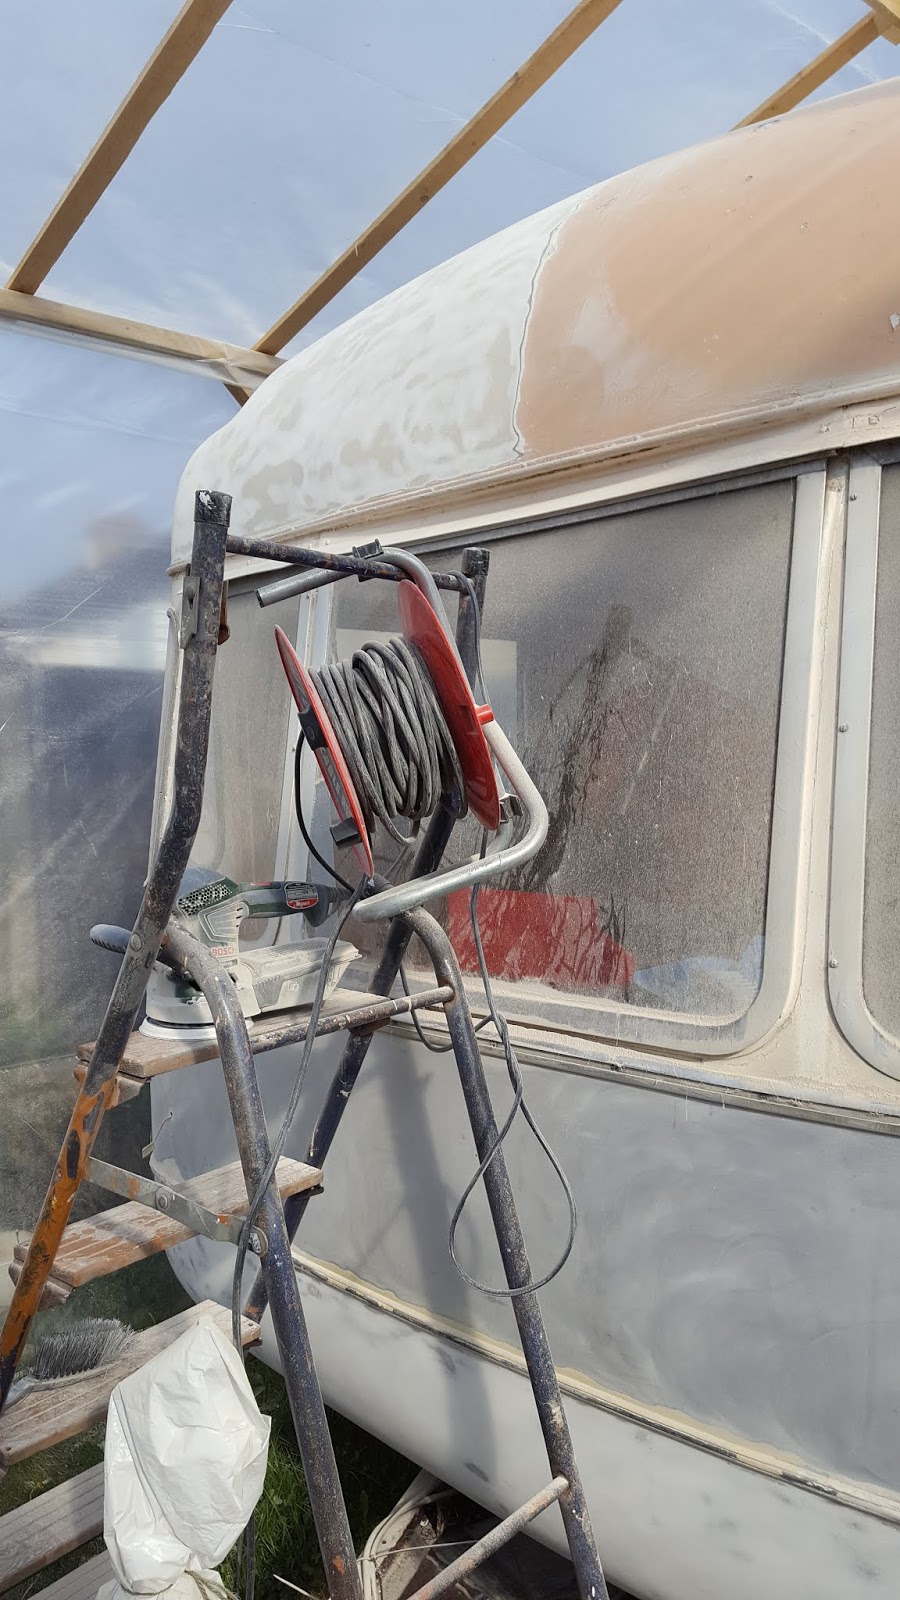
| The roof before we started stripping it. |

 |
| Multiple layers of paint visible midway through sanding. |
Tricky areas were stripped with Nitromors. It's not as good as it used to be. In fact, it's rubbish! I can't recommend it. Years ago, two applications would have cut through many layers of paint, but now it takes two applications for each layer.
Another key step to a good restoration is to remove all exterior fittings. You could mask and paint round them, but many of the trims cover joins in the body panels, so how do you know if the sealant behind the fittings is sound? Also, paint will form a ridge against the fittings or could bleed under the masking tape onto your trim/lights/badges/whatever, and make the finished job look messy. All fittings were removed from our Viking and bagged separately, together with their fitting screws. I recommend replacing the screws with new stainless steel ones, but at least by keeping the old ones, I will know what sizes to buy when I finally get round to putting it all back together. The trim around Viking caravans has a plastic insert called Herzim strip. It is readily available from trim suppliers but comes in a variety of sizes, so measure the width before ordering. Removing the Herzim strip reveals screw heads. These screws hold the aluminium trim strips in place, plus they screw the bodywork to the timber frame of the caravan. After almost fifty years, most of the sealant had dried behind the trim and in the overlaps where fibreglass meets aluminium, and will be a potential leak point. There are over 100 screws around our Viking, and almost every one had corroded. Very few could be unscrewed, even after cutting new slots in the head with a miniature cutting tool. In the end, we had to drill these screws out, starting with a 1mm drill bit and then increasing the bit size by ½ mm increments until the screw is removed; another time consuming job. To give you some idea, each long length of trim took a day to remove. There are ten trims, so that was five full weekends of work. We broke or blunted over 100 drill bits. The plus sides of this exercise are that the aluminium trims are easier to polish when not attached to the 'van, it's easier to paint without any obstructions, we will not have nasty ridges around fittings in our paint job, and we can access all the body seams for resealing.
 |
| Middle trim removed |
 |
| An old kitchen knife was used to cut through the sealant behind the trims. |
The windows were left in place initially, to keep the dust levels down inside the caravan, but eventually, the windows had to be removed in order to strip paint around them. All 12 windows came out. The hinges of the opening windows could have been dismantled in order to remove the frame and glass, but the hinge and its weather cover would still be attached to the caravan. So, following our ethos with the other fittings, the whole lot was removed. The weather covers were unscrewed and had to be prised off with a knife as the sealant was still sticky. The covers are thin strips of aluminium and are easily bent during this process, so take care. I straightened them out after with a hammer and a block of wood on a workbench. The screws for the window hinges are then accessible, and there is more sealant behind the hinges. The fixed windows are simply unscrewed and any functioning sealant was cut, and for the corner windows, it is a case of removing the central filler strip of the seal, then removing the seal itself. Be careful with the corner windows. They are thin Perspex and can crack easily. Additionally, they appear to have been hand cut at the Viking factory and are all different sizes, so buying second hand ones will not always provide you with a usable replacement.